
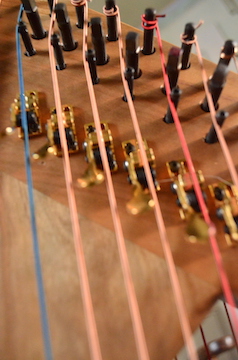
My last batch of replacement wires have arrived for my harp and I’ve learned from my string maker Laurie at Markwood Strings (highly recommended by the way!!) that the old strings which were breaking so much are bronze only. My new ones are copper phosphor bronze alloy and Laurie very kindly provides them with the metal toggles already installed and neatly coiled and labelled according to their diameter in plastic zip bags.
For anyone who’s considering restringing their wire harp, especially a double-strung instrument, here’s a few helpful tips I’d like to share:
Your instrument might have a “good side” and a “bad side”. Meaning, the left side breaks strings more easily than the right, or vice-versa. If you know which one that is or if that’s even an issue for you, start restringing on the good side. The new strings will help carry the tension load for the opposing side.
I’ve been starting at the top and working my way down. Although this harp is designed to be tuned to A=440, I’m not actually tuning it to that reference pitch for the moment. Instead, I’m letting the new wires settle at some ridiculously low pitch, where they feel comfortable and not liable to break. At the moment, this means A=355. This is temporary. The harp will naturally come up in pitch on its own, but the idea is to reduce the likelihood of breaking the new strings because they’ve been brought up to normal tension too quickly.
Carefully remove the old strings and use them as a rough guide to measure the length for cutting your new ones. I’ve found I actually prefer mine shorter, because they wind easier. Be especially slow and careful about getting the wire wrap on the tuning pins right – no crossing over!
After you get a wire on, let it sit for an hour or so… don’t try to bring it up to full tension. Don’t even try to bring it up to partial tension: your A=355 or whatever you’re currently starting with. It doesn’t have to be floppy, but it does need to be able to straighten itself out a little bit. There may be a few slight bends in the wire from its having been stored in a baggie; let it stretch out a bit. After an hour or so, come back and start taking up the slack gently. Aim for a gradual arrival at the temporary reference pitch. This may take several hours. When it’s there and it’s stable and not drifting down in pitch, time to start working on the opposite side.
Also keep checking to make sure that the toggle has seated properly underneath the soundboard. If it hasn’t, you may need to back off bringing the wire up to tension and carefully wiggle it into place. Sometimes wires will break just above the soundboard if there’s some settling/stretching issues going on there and the wire wrap just above the toggle hasn’t found its way into the hole.
I keep a log of the string number and date that it was changed. I’ve found that aiming for no more than two string changes per day seems to be the most successful strategy, as it takes time for the new wires to settle in and it’s the least stressful to the harp.
And lastly, watch out for the ends! They’re sharp, especially after you cut them with wire cutters. They’re great at scoring up your much-needed playing fingernails as you try to slide the wire winding over and past that little bit poking out of the tuning pin.
There’s my best tips so far. Much more enjoyable to play your harp than to restring it, but if you have to, I hope my posts have been helpful!